


Click machine
“MA1” to set-up
with S.A.M.
or
“MA4” for the TWig
method.


To Job Control:


Job Management Module


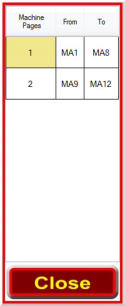
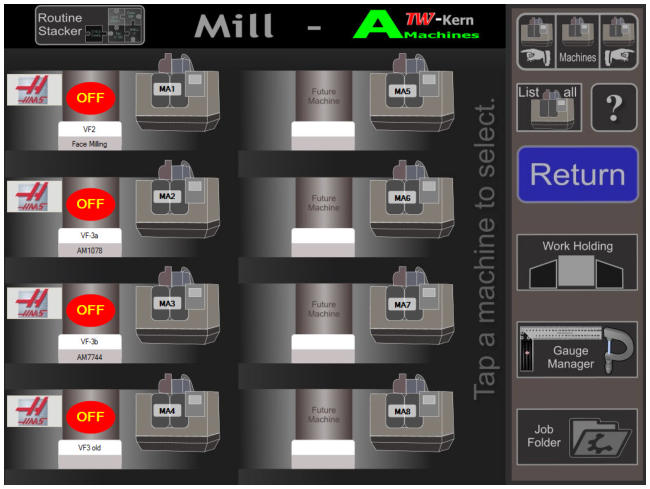
More Machines
You can set up 99
machines for each
machine type.
Four mill types.
Four turning center
types.
Four combination
machine types.
Toggle
machine
ON / OFF
OFF
ON
Toggle
machine
ON / OFF
OFF
ON
To select a machine you
have to tap (click) on the
outline of the machine.
(for advanced users)
Click machine
“MA1” to set-up
with S.A.M.
The FAUST methods
“Traditional & SAM” are
for “Cell” operations
only!
(Tool Room
compatible)
Click machine
“MA4” for the TWig
method.
TWig method for
easy
implementation!
Job number
running in
machines
MA1
MA2
MA3
MA4
Click machine
“MA1” to set-up
with S.A.M.
(for advanced users)
The FAUST methods
“Traditional & SAM”
are for “Cell”
operations only!
Note: If you are new to Tool Wall
select the demo of machine 4
(MA4). It explains the TWig set-
up method.
The MA1 demo shows the FAUST
quick-set set-up which is not suitable
for new Tool Wall users.
Click machine
“MA4” for the TWig
method.
TWig method for
easy
implementation!
(Tool Room
compatible)
Old habits are hard to die. As one customer
remarked: “You can come and change everything in
my shop as long as you don’t change anything”!
To keep changes to a minimum use the TWig method
to set up for new jobs.
If you want to try the FAUST methods setup, take the
G-Code of a small machined part and have the wizard
translate it into the Tool Wall format.
Your original code is only copied and not altered!
Tool Wall gives you a lot of options to adapt for your
unique operation.
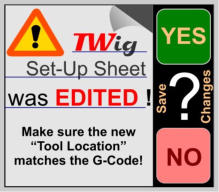
Warning:
When you edit the TWig
set-up sheet, you must
edit your G-Code as well!
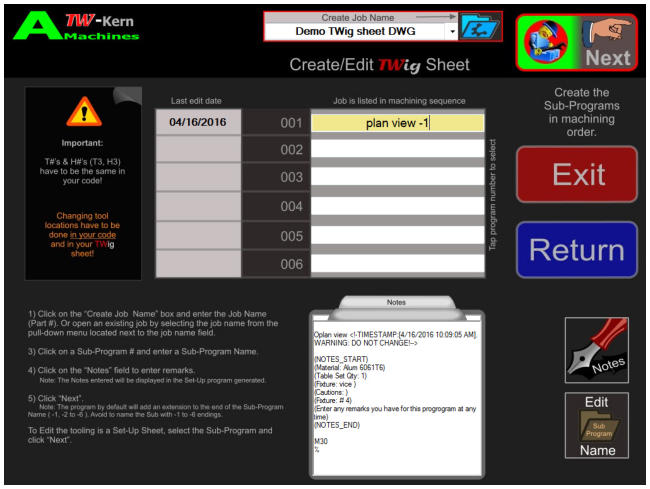
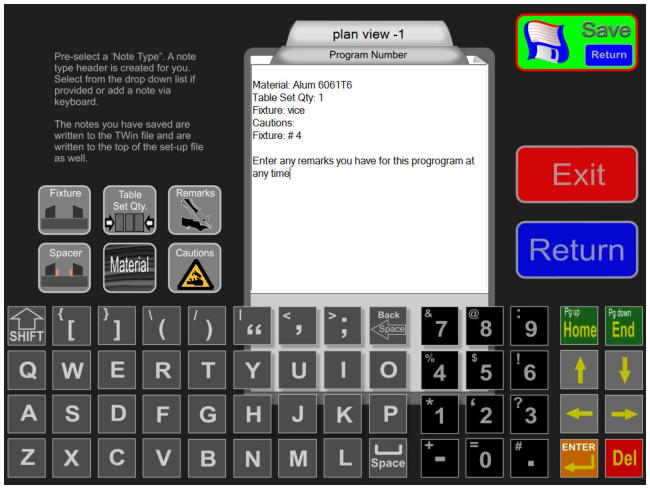
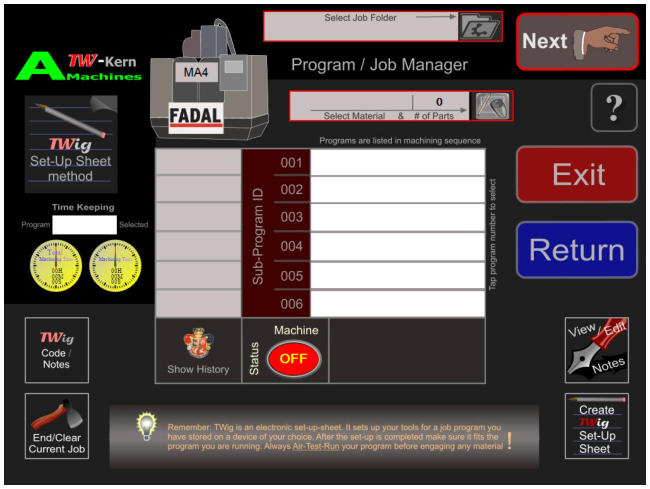
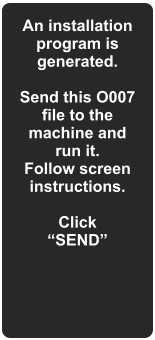
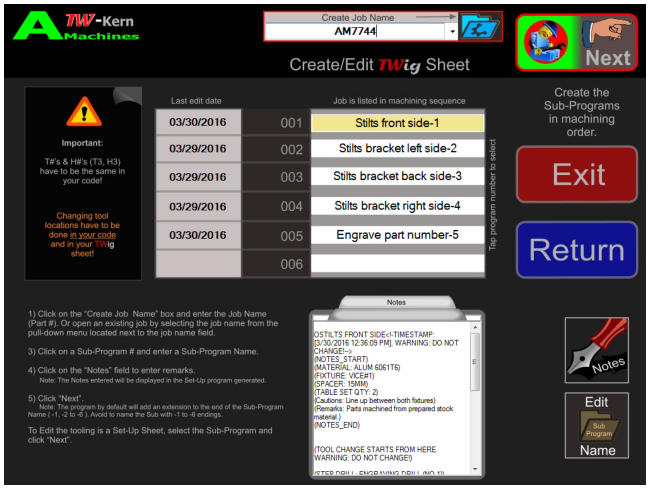
Create a job & and
sub-program O001
name.
The -1 and the date is
automatically assigned.
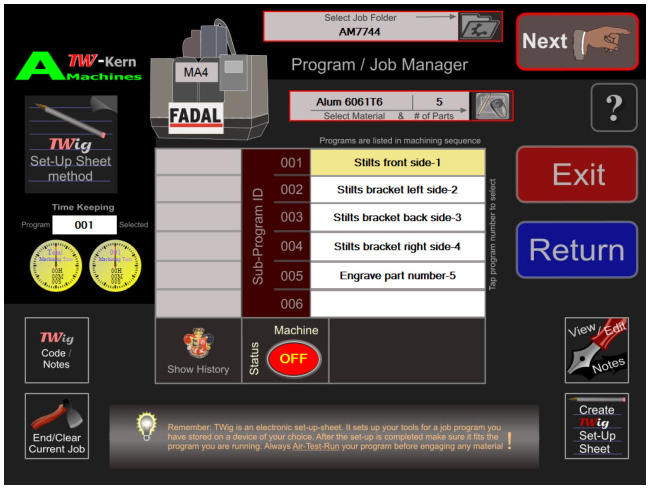
Structure the sub-
programs in Machining
Order. The O001 is the
first side to machine -
and so on.
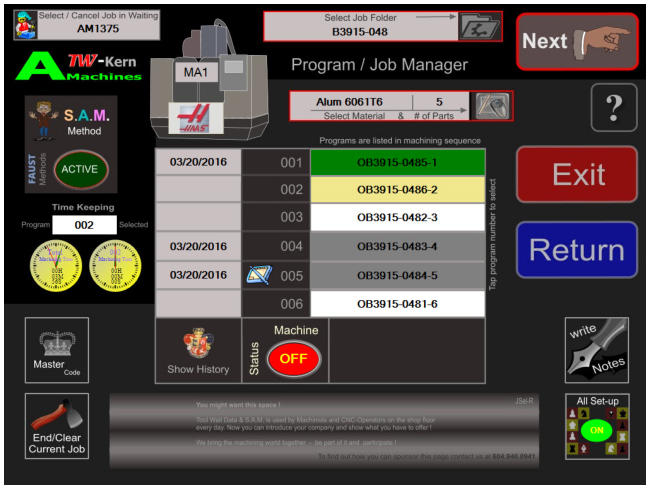
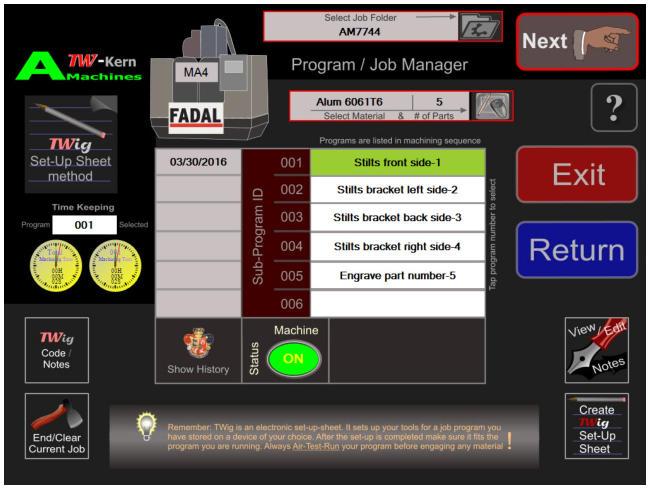
Creating a TWig job setup sheet
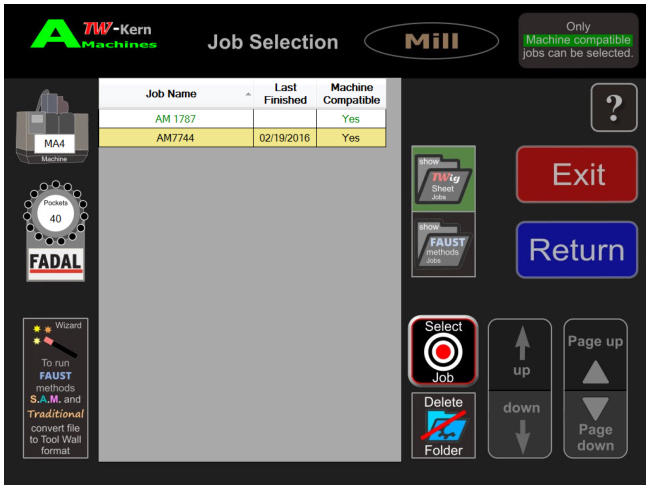
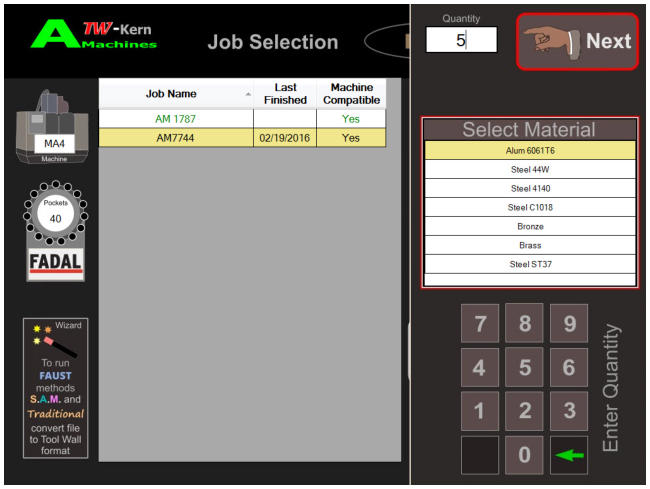
Displays all jobs that
are in the system for
the “A-Machines”
group.
Here also is the link for
the creation of the
TWig (Tool Wall instant
gain) set-up sheet. The
most intuitive and
fastest method to reap
the benefits of Tool
Wall.
TWig & FAUST job set-up method files
Displays all jobs that
are in the system for
the “A-Machines”
group.
Here also is the link for
the creation of the
TWig (Tool Wall instant
gain) set-up sheet. The
most intuitive and
fastest method to reap
the benefits of Tool
Wall.
TWig & FAUST job set-up method files
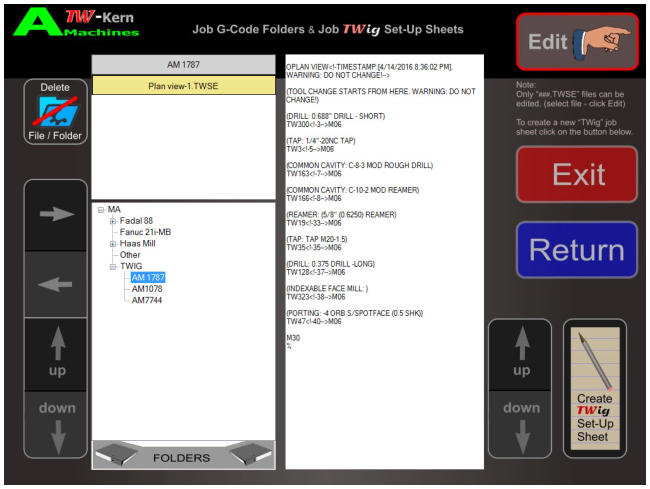
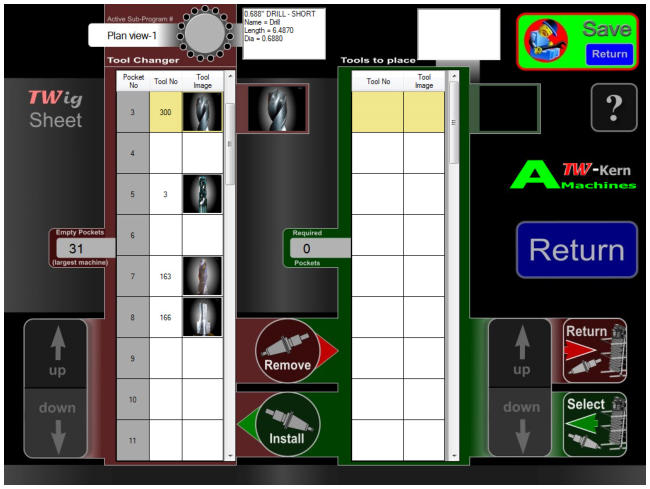
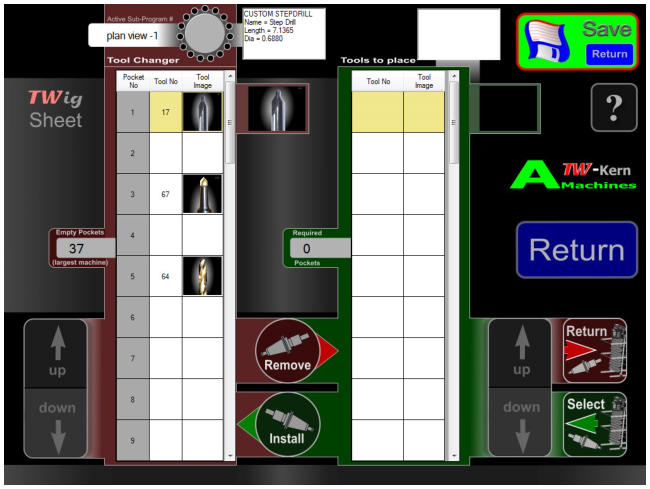
The TWig (Tool Wall instant
gain) set-up sheet with
tools needed and the
tool change locations for
the program “Planview-
1” is displayed.
You can re-arrange, add
or delete tools.
Save and re-write the
TWig set-up sheet.
Warning:
When you edit the TWig
set-up sheet, you must
edit your G-Code as
well!
TWig sheet tool editing. Select a new tool
TWig job set-up method displayed
Warning:
When you edit the TWig
set-up sheet, you must
edit your G-Code as well!
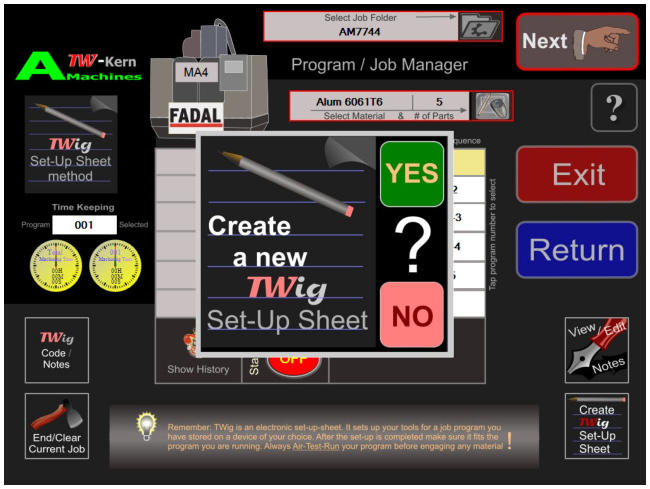
Create a job & and
sub-program O001
name.
The -1 and the date is
automatically assigned.
Structure the sub-
programs in Machining
Order. The O001 is the
first side to machine -
and so on.
Creating a TWig job setup sheet
Warning:
When you edit the TWig
set-up sheet, you must
edit your G-Code as well!
Select and place the
tools needed into
the correct tool
changer position.
Click: Install
Creating a TWig job setup sheet
Warning:
When you edit the TWig
set-up sheet, you must
edit your G-Code as well!
Select and place the
tools needed into
the correct tool
changer position.
Click: Save
Creating a TWig job setup sheet
Warning:
When you edit the TWig
set-up sheet, you must
edit your G-Code as well!
Select and place the
tools needed into
the correct tool
changer position.
Click: Yes
Your TWig is complete
and you can use it for the
automated set-up.
Creating a TWig job setup sheet
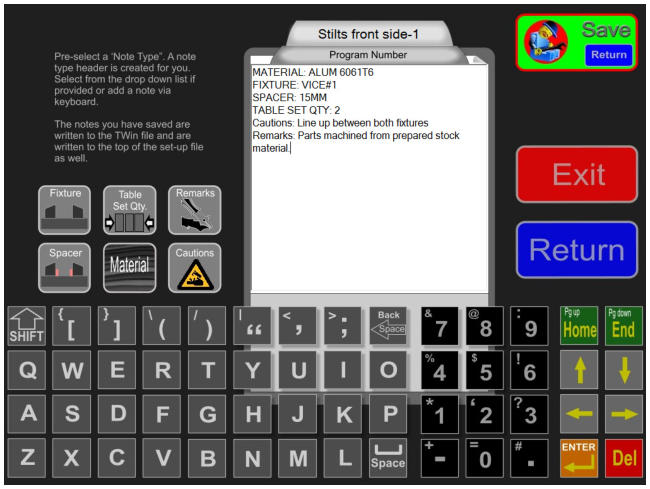
The TWig method is
based on your existing
Set-Up paper sheet
which is transfered into
the TWig format.
It works the same way
you’ve always done it.
Only now in an
automated fashion.
In our example we are
setting up for a new
job.
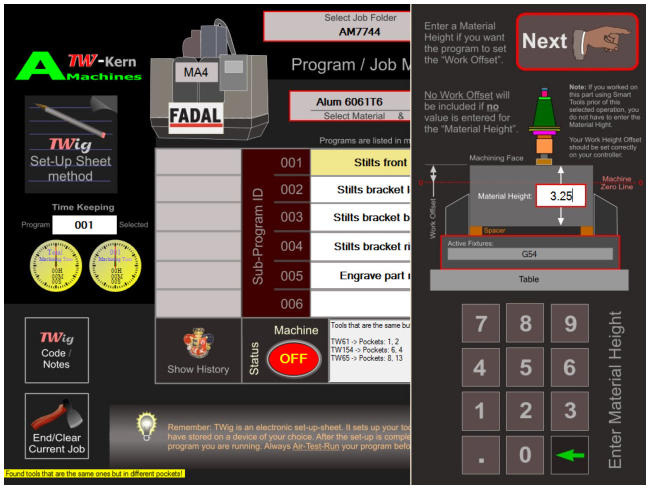
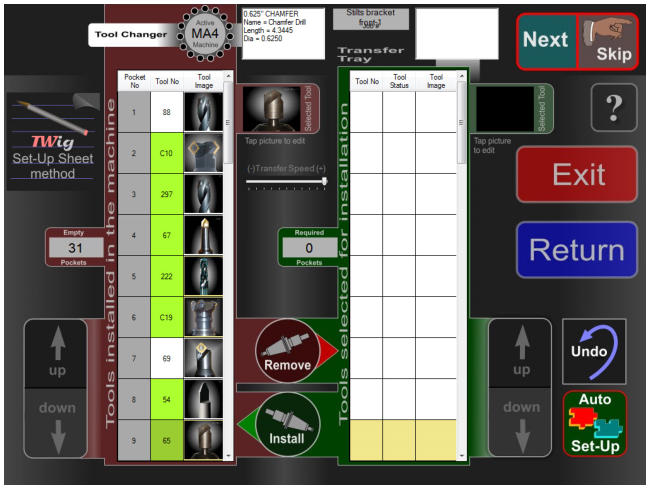
Your G-Code can be
uploaded from any
source. Just make sure
the offset calls in the
code match the tool
pocket number.
T7=H7 - D7
TWig job set-up method displayed
The TWig method is
based on your existing
Set-Up paper sheet
which is transfered into
the TWig format.
It works the same way
you’ve always done it.
Only now in an
automated fashion.
In our example we are
setting up for a new
job.
Your G-Code can be
uploaded from any
source. Just make sure
the offset calls in the
code match the tool
pocket number.
T7=H7 - D7
TWig & FAUST job set-up method files
The TWig method is
based on your existing
Set-Up paper sheet
which is transfered into
the TWig format.
It works the same way
you’ve always done it.
Only now in an
automated fashion.
In our example we are
setting up for a new
job.
Your G-Code can be
uploaded from any
source. Just make sure
the offset calls in the
code match the tool
pocket number.
T7=H7 - D7
TWig job set-up method displayed
The TWig method is
based on your existing
Set-Up paper sheet
which is transfered into
the TWig format.
It works the same way
you’ve always done it.
Only now in an
automated fashion.
In our example we are
setting up for a new
job.
Your G-Code can be
uploaded from any
source. Just make sure
the offset calls in the
code match the tool
pocket number.
T7=H7 - D7
TWig job set-up method displayed
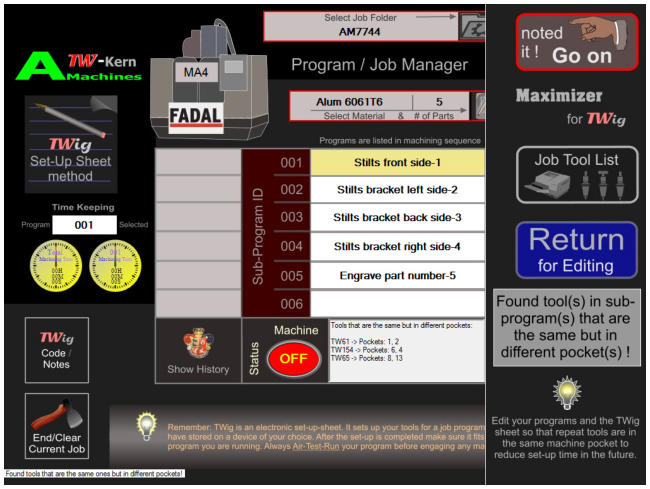
Maximize
your programs
Alert
All subprograms are
scanned.
This alert is
displayed if the
program found the
same tool in different
subprograms but in
different pockets. You
should edit the G-code
and the TWig sheet to
streamline it.
Click
“Go on”
TWig job set-up method displayed
Maximize
your programs
Alert
All subprograms are
scanned.
This alert is
displayed if the
program found the
same tool in different
subprograms but in
different pockets. You
should edit the G-code
and the TWig sheet to
streamline it.
Click
“Return”
TWig job set-up method displayed
The TWig method is
based on your existing
Set-Up paper sheet
which is transfered into
the TWig format.
It works the same way
you’ve always done it.
Only now in an
automated fashion.
In our example we are
setting up for a new
job.
Your G-Code can be
uploaded from any
source. Just make sure
the offset calls in the
code match the tool
pocket number.
T7=H7 - D7
TWig job set-up method displayed
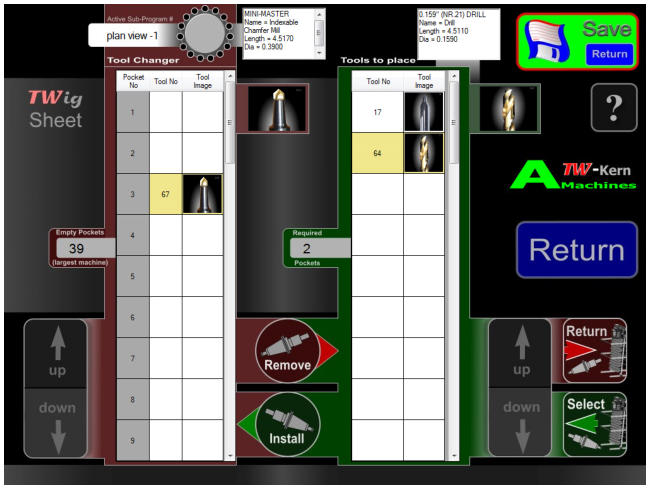
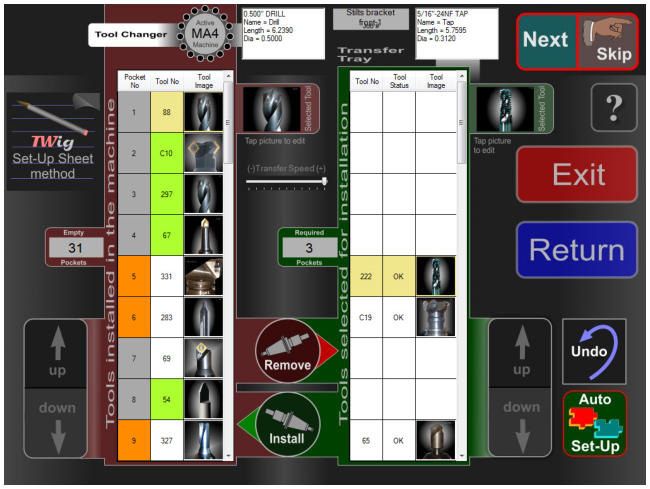
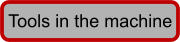
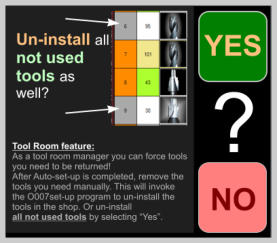
Tools that are
already in the
machine for
this
sub-program.
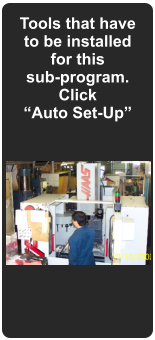
Tools that have
to be
un-installed
from the
tool changer.
Tools that are
already in the
machine for
this
sub-program.
Tools that are
in the tool tray
and have to be
installed into
the
tool changer.
The TWig method is
based on your existing
Set-Up paper sheet
which is transfered into
the TWig format.
It works the same way
you’ve always done it.
Only now in an
automated fashion.
In our example we are
setting up for a new
job.
Your G-Code can be
uploaded from any
source. Just make sure
the offset calls in the
code match the tool
pocket number.
T7=H7 - D7
TWig job set-up method displayed
The TWig method is
based on your existing
Set-Up paper sheet
which is transfered into
the TWig format.
It works the same way
you’ve always done it.
Only now in an
automated fashion.
In our example we are
setting up for a new
job.
Your G-Code can be
uploaded from any
source. Just make sure
the offset calls in the
code match the tool
pocket number.
T7=H7 - D7
Select an empty
sub program
field to add
a new TWig
sheet
Click “Return”
TWig job set-up method displayed
Frequently asked Questions to Job Control:
Which set-up method is best for me: Generally you should use the TWig method.
What are the changes I have to make to use the TWig method: All you have to do is to transfer your existing set-up-sheet
into an e-set-up-sheet. A wizard for it is provided in Tool Wall.
What happens to my G-Code: Nothing. The code can be located in the same folder you have it now and used the same way.
What does the e-set-up-sheet do: It scans and places the tools with the offsets into the correct locations for the related
G-Code file.
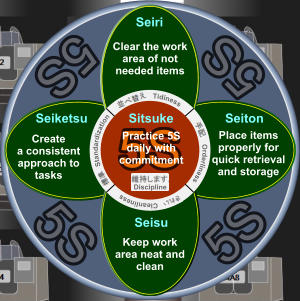
5S brings vast Productivity, Organisational, Neatness,
Standardisation and Safety improvements when implemented.
5S(methodology) tool handling system